How To Make DIY Polyurethane Engine Mounts

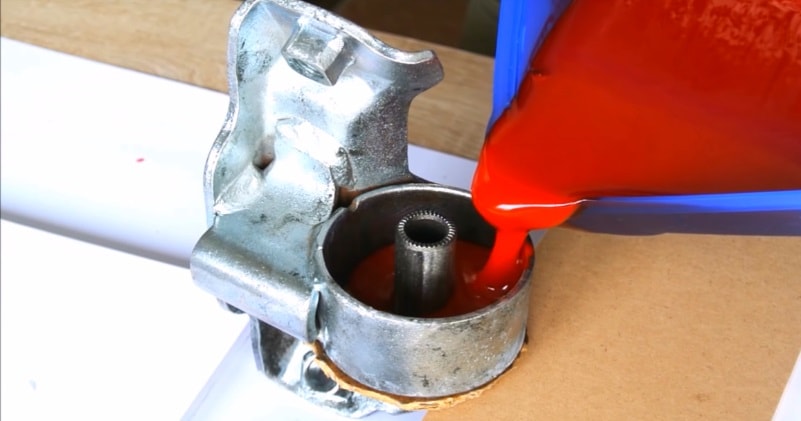
Here’s a detailed video showing you how to make polyurethane engine and transmission mounts from liquid polyurethane.The advantages of doing this as opposed to buying ready made aftermarket polyurethane engine mounts are that this method is much cheaper (25 USD for 4 mounts vs. 160 USD for 2 mounts in the case of my car).
source/image(PrtSc): driving 4 answers
The advantages of polyurethane engine (especially torque mounts) are improved responsiveness, no need to replace the mounts ever again, reduced wheel hop and preventing horsepower lost on moving the engine back and forth. The video shows a detailed procedure, from removing the old mount inserts, burning out the rubber, and pouring in new liquid polyurethane.driving 4 answers
The product I used is reoflex 60 from smooth-on. There are many others out there however, this is just what was available to me and in the right shore hardness.The additional benefit of DIY mounts is the fact that you can customize the shore hardness of the mounts to make it best suited to your particular application.
Advertisement
I have selected 60A shore hardness which is a nice compromise between the 80A shore hardness stuff which is more suited to track day cars and the 40A shore hardness stock rubber. The important thing is to ensure the pins inside the mounts are fitted in the same position as stock and they must be positioned to stand flat for the liquid polyurethane to cure properly.driving 4 answers
http://bit.ly/2IZ52vD